If you’re looking for a solution to housing your ever-growing pile of books, may I suggest a simple weekend DIY project?
Painting bookshelves is surprisingly easy and affordable. Generally there are three types of bookcase redos: 1) painting or refinishing a thrift store find in an ultra-stylish color for an eclectic home filled with highly personal belongings; 2) painting a cheap, pre-manufactured, flatpack bookcase because you’re on a budget but still want some personal flair; 3) doing everything in the second category on steroids because you’re going for a custom, built-in look for a fraction of the price.
This tutorial will cover the second category. If you’re looking to bring style, cohesion, and unity to your space, it’s a good place to begin!
I’m in the process of adding bookshelves to my home and want to bookshelves to match my kitchen cabinets. It’s a multi-weekend project, but even my built-in, customized shelves must begin with the steps in this tutorial. So without further ado, here’s what you need to know.
What You’ll Need:
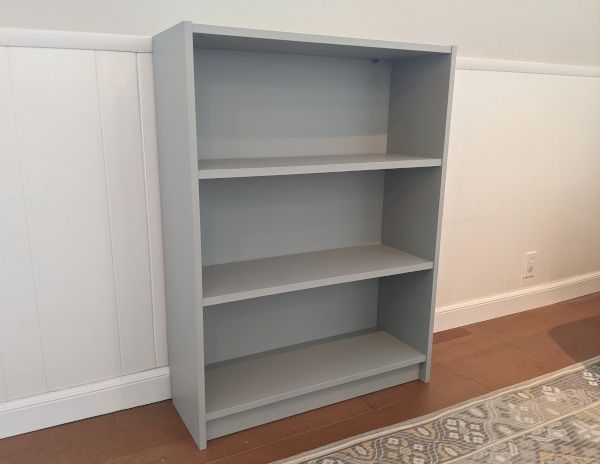
- Self-assemble bookcase of your choice. I like Ikea’s Billy Bookcases, but any pre-manufactured bookcase will do.
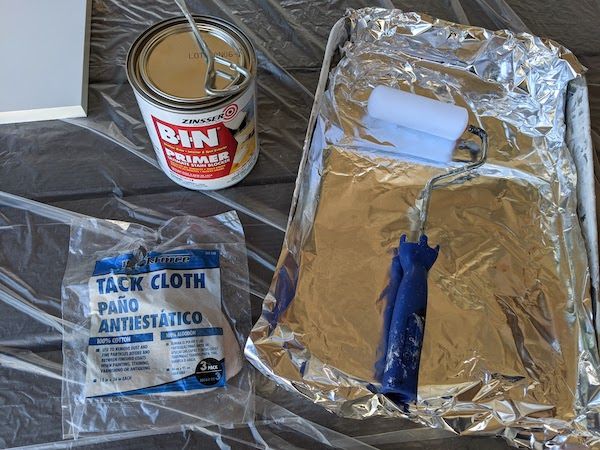
- Zinnser BIN Primer. This stuff will stick to any surface, which eliminates the need to sand or strip existing finishes. You can use it on thrift store finds as well as factory finished shelving.
- Paint in your chosen color. You might choose glossy for a modern look, but beware that every imperfection will show. I personally love Benjamin Moore Aura for its non-toxic, beautiful finish. Just know it’s pricey and likely to cost more than your flatpack bookshelves.
- Paint tray. I simply use aluminum foil as a disposable liner. I also use foil as a tray cover in between coats during dry time to prevent the paint from gumming up.
- Tack cloth. A sticky cloth that you’ll run over your pieces before painting to ensure a clean surface.
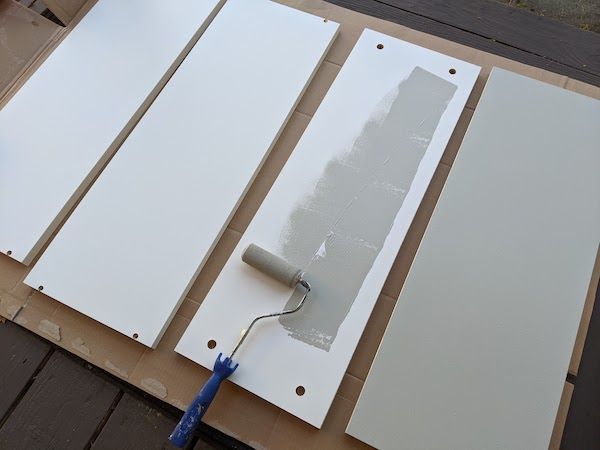
- Paint roller. A mini paint roller with high-density foam gives the smoothest finish and is the perfect size for this scale of painting.
- Drop Cloth. You can also use old sheets, plastic, or butcher paper.

Notes Before Beginning
- Work in a ventilated area. Avoid working in temperatures below 50 degrees Fahrenheit and during times of high humidity. If you do, the paint will take forever to dry.
- If the shelves are the kind you assemble by yourself, it’s a lot easier to paint before assembling. So, paint first, then assemble.
- The right primer is everything.

Directions
- Lay out the drop cloth and all your pieces.
- Wipe the surfaces which are facing up with tack cloth.
- With about half a quart of primer poured into the paint tray, load your roller and begin covering your pieces. Use even pressure and make sure you don’t leave streaks.
- Once the primer is dry (10–15 minutes), flip the piece and repeat step 3.
- Once the second side dries, roll the edge and let dry.
- Now that the pieces are properly primed, ready your paint tray with the paint color and sheen of your choice using a new liner and new foam roller.
- Repeat steps 3–5 using paint.
- Depending on the paint you’re using and the color you’ve chosen, you may need to repeat steps 3–5 for a second coating.
- Once everything is evenly coated, dry, and beautiful, assemble your bookcase as directed. You’re DONE!

